
Open the Solve Panel
Click Solve in the toolbar, then set the following:
- Solver: Iterative or Direct.
- Mesh: the mesh to solve on.
- CPU cores: how many cores to use.
- Load cases: which load cases to solve. Use Select all to run them together.
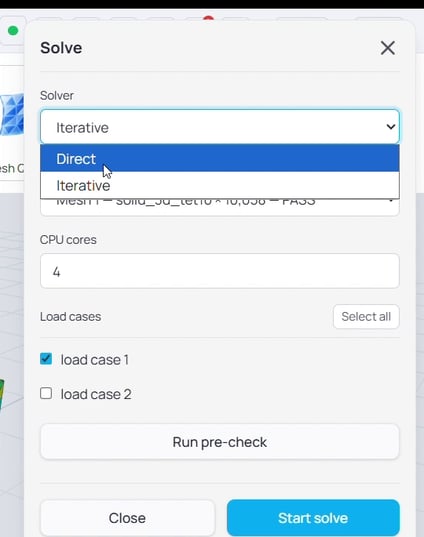
Figure 1. The Solve panel with the solver set to Iterative or Direct, plus CPU cores and load case selection.
Iterative or Direct
We recommend the iterative solver. It is faster and works well for large meshes with many degrees of freedom (DOFs). If it does not converge, fall back to the direct solver, which is slower and better suited to small meshes with fewer degrees of freedom. An iterative solver might solve a task within 1 minute while a direct solver could take 1 hour.
Run the Pre-Check
Click Run pre-check before you solve. It validates the setup, including geometry, material, mesh and mesh quality, load cases, boundary conditions, loads, and solver, and reports anything that needs attention.
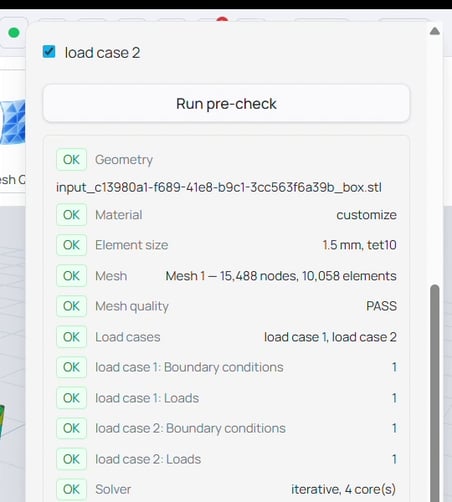
Figure 2. The pre-check validates each part of the setup before you solve.
- A failure blocks the solve and must be fixed.
- A warning does not block the solve. Review it, and continue if you are satisfied. Often, if the constraint and load are assigned to a geometry instead of a mesh, a small area different could happen at the edge of the target region for constraints and loads. A warning will be given out, but it should not affect the result.
Submit and Track the Job
Click Start solve. The job runs in the cloud. Open Jobs to see its state, from queued through to finished, and to cancel a run if you need to.
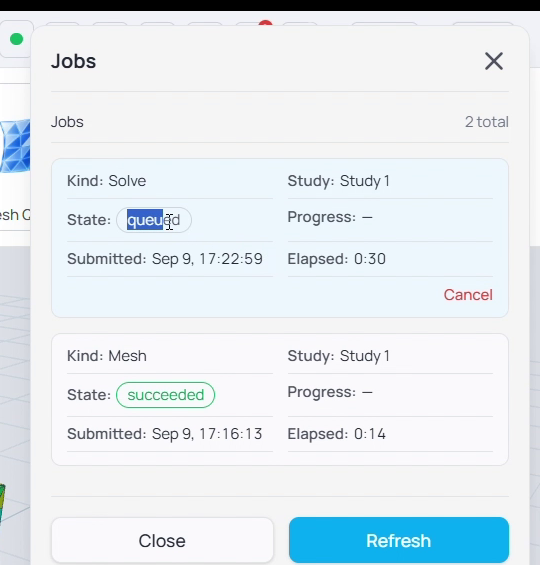
Figure 3. The Jobs panel tracks each run. Here the solve job is queued and the mesh job has succeeded.
What Comes Next
Reading and interpreting the results, including displacement, stress, and strain, is covered in the next article in this series, Viewing and Interpreting Results.
Quick Reference
|
Action |
What it does |
Where to find it |
|
Solve |
Opens the Solve panel |
Toolbar |
|
Solver |
Iterative (faster, large meshes) or Direct (fallback, small meshes) |
Solve panel |
|
CPU cores |
Cores used for the solve |
Solve panel |
|
Load cases |
Which cases to solve; Select all runs them together |
Solve panel |
|
Run pre-check |
Validates the setup before solving |
Solve panel |
|
Start solve |
Submits the job to the cloud |
Solve panel |
|
Jobs |
Track or cancel running jobs |
Toolbar |
| Previous Article | Next Article |
| sphereneNXT Simulation (Part 4): Meshing and Mesh Quality | sphereneNXT Simulation (Part 6): Viewing Results |