
Open the Materials Panel
With your active study, click Materials in the toolbar. The Material panel opens on the right. The material you define is stored on the active study, so confirm that the correct study is selected before you start.
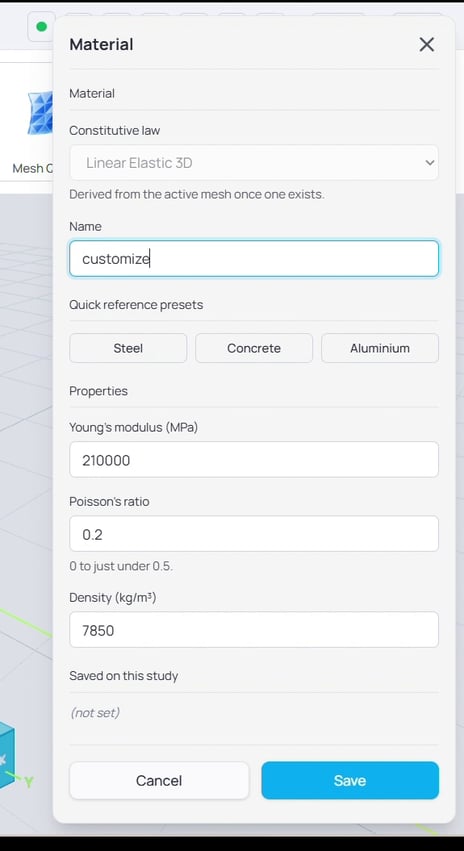
Figure 1. The Material panel. Set the constitutive law, choose a preset or enter properties, name the material, and save.
Start From a Preset
The panel includes quick reference presets for steel, concrete, and aluminum. Click one and it fills in the properties, which you can then adjust. The constitutive law is Linear Elastic 3D.
- Young's modulus (MPa)
- Poisson's ratio
- Density (kg/m3)
Tip: Presets are a starting point. Confirm the numbers against your own material data before you click save.
Enter Your Own Properties
To define a custom material, edit the property fields directly. Rename the material so it is easy to recognize in the layer tree, then click Save.
Check It in the Layer Tree
Your material appears under the Material sub-layer of the active study. Double-click it at any time to reopen the panel and edit it.
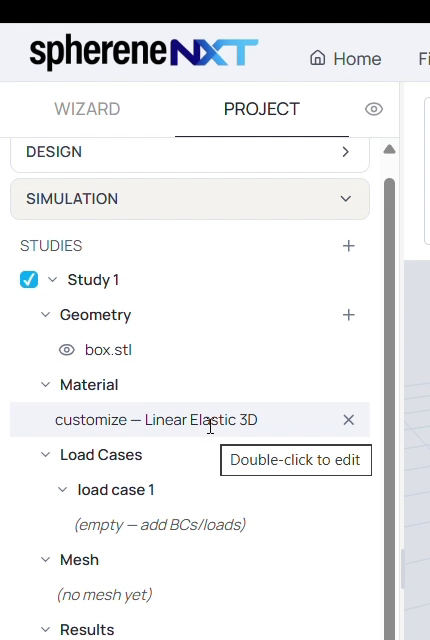
Figure 2. The saved material under the Material sub-layer. Double-click it to edit.
Quick Reference
|
Action |
What it does |
Where to find it |
|
Materials |
Opens the Material panel for the active study |
Toolbar |
|
Quick reference presets |
Fills properties for steel, concrete, or aluminum |
Material panel |
|
Young's modulus, Poisson's ratio, density |
The properties the solver uses |
Material panel |
|
Name |
Labels the material in the layer tree |
Material panel |
|
Save |
Stores the material on the active study |
Material panel |
|
Double-click the material |
Reopens it for editing |
Layer tree, Material |
Previous Article |
Next Article |
| sphereneNXT Simulation (Part 3): Constraints and Loads |