
Switch to the Simulation Section
To work on a simulation, open the Simulation section in the layer tree. The top toolbar changes to the simulation tools: New Study, Materials, Constrain, Load, FE Mesh, Mesh Quality, and Jobs.
You need at least one model in the design space before you begin.
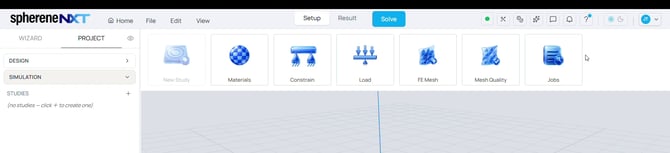
Figure 1. With the Simulation section open, the toolbar shows the simulation tools: New Study, Materials, Constrain, Load, FE Mesh, Mesh Quality, and Jobs.
Create a New Study
There are two ways to start a study: click the plus next to STUDIES in the layer tree, or click New Study in the toolbar. Either opens the New Study dialog.
- Study type is Linear static mechanics.
- Involved geometry lists the models in your study. Pick your geometry from the list, and use Add More to include additional models.
Click Apply to create the study.
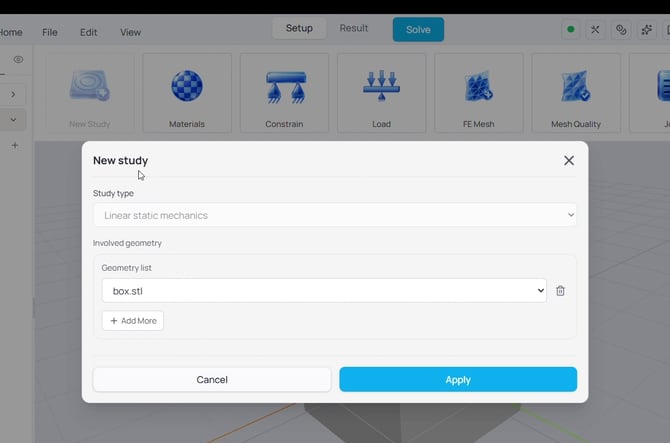
Figure 2. The New Study dialog. Study type is Linear static mechanics, with the involved geometry selected below.
The study appears in the layer tree with its five sub-layers: Geometry, Material, Load Cases, Mesh, and Results. Your geometry is already listed under Geometry, ready for the setup that follows in the next articles.
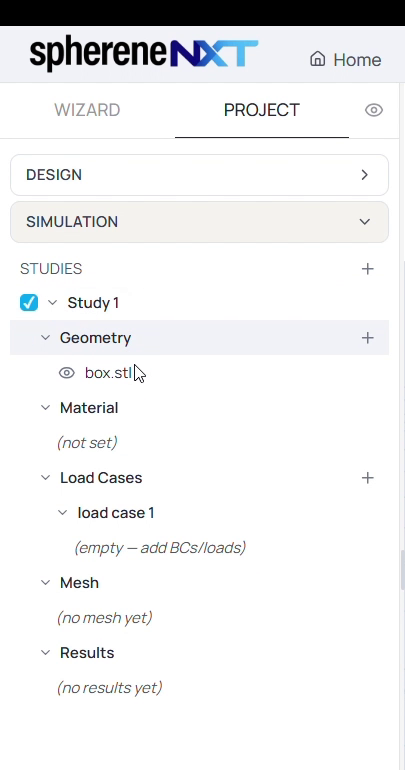
Figure 3. A new study in the layer tree. Geometry is populated, and Material, Load Cases, Mesh, and Results are waiting to be defined.
Tip: You can add more geometry to a study later using the plus next to Geometry in the layer tree.
Work With Multiple Studies
You can create as many studies as you need, each built on the same geometry or on different geometry. Use New Study again for each one, and every study shows up in the layer tree.
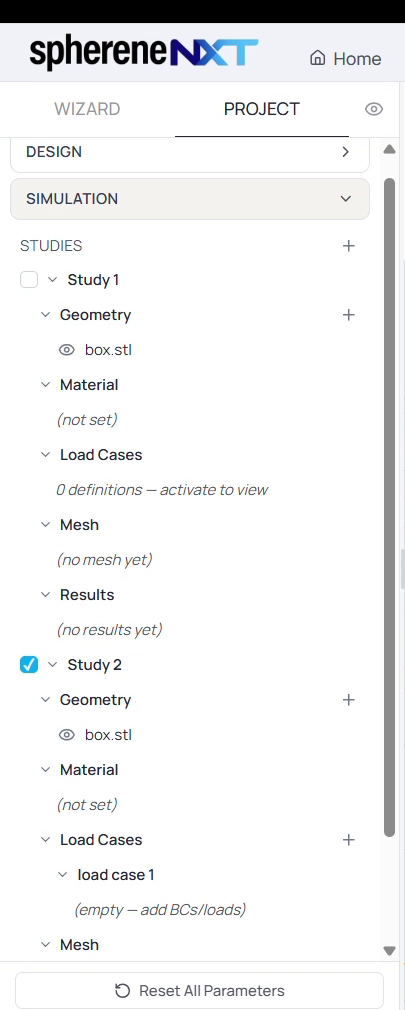
Figure 4. Two studies in the layer tree. Study 2 is checked, so it is the active study.
Each study has a checkbox on the left. The checked study is the active one, and every action you take next, whether assigning a material, adding loads, meshing, or solving, applies only to the active study. Check a different study to move your focus to it.
Tip: If a change is not landing where you expect, check which study is currently active.
Quick Reference
|
Action |
What it does |
Where to find it |
|
Open the Simulation section |
Switches the toolbar to the simulation tools |
Layer tree, Simulation |
|
New Study |
Creates a study from one or more models |
Toolbar, or plus next to STUDIES |
|
Study type |
Set to Linear static mechanics |
New Study dialog |
|
Add More |
Adds geometry to the study |
New Study dialog |
|
Active study checkbox |
Sets which study your actions apply to |
Layer tree, next to each study |
|
Plus next to Geometry |
Adds more geometry to an existing study |
Layer tree |
Previous Article |
Next Article |