
What You'll Need First
The wizard is the guided way to engineer the inside of a part in sphereneNXT, but it still needs something to work with. Before you launch it, have a CAD file ready to use as your envelope; the base shape the wizard will fill with structure. Once that's in hand, the wizard walks you through every parameter step by step, explaining each one in context, so you always know what you're doing and why.
Tip: There are three design methods to choose from: Core ADMS for general geometry, Flow ADMS for fluid application, and TPMS for triply periodic minimal surfaces. This article follows Core ADMS, since it's the most common starting point.
Launching the Wizard
Start from the Home page and click Launch wizard on the Design with the wizard card.
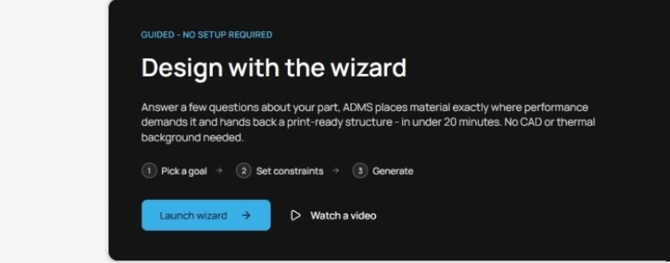
The wizard card on the Home page
The wizard can be accessed from inside a project on the left panel next to Project.
You'll see three design methods on the left.
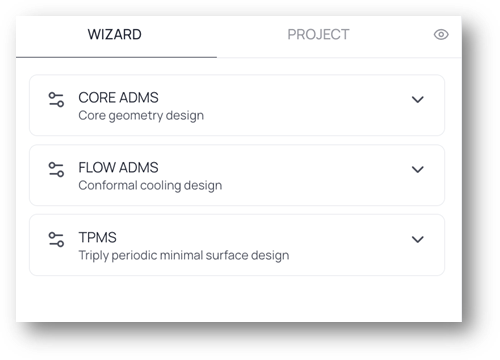
Core ADMS, Flow ADMS, and TPMS, the three design methods
- Core ADMS for core geometry design.
- Flow ADMS for a flow-intrinsic geometry design.
- TPMS for triply periodic minimal surface design.
Click the method you want to expand it, then click Start. This article uses Core ADMS.
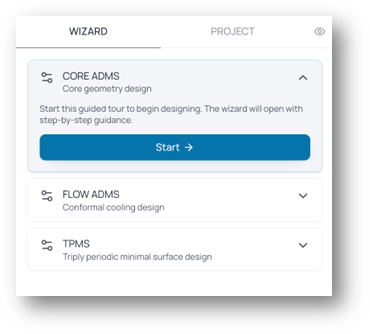
Starting the guided tour for Core ADMS
This opens the Getting Started Guide, a step-by-step tour of every parameter that ends with your first computation.

Welcome to sphereneNXT, the wizard's guided tour overview
The tour groups everything into four broad stages: Surface, Solid, Modifications, Compute. Behind those, sphereneNXT breaks them down further into five phases you'll see listed on the left as you go.
Tip: Any step marked with a red dot is mandatory. You can't run a computation until every mandatory step is filled in. Everything else is optional, and you can always come back to it later.
Phase 1: Surface
This is where you define the geometry and parameters that sphereneNXT will work with.
Envelope
The envelope is the object you want to fill with ADMS. Give it a name, then upload it: drag and drop, or click browse. Accepted formats are STEP/STP, STL, PLY, OBJ, 3MF, and IGES, up to 50 MB.
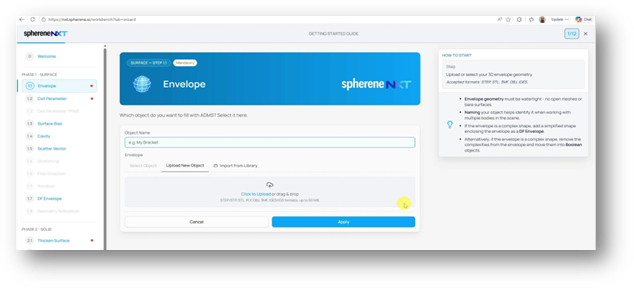
The Envelope step, before uploading
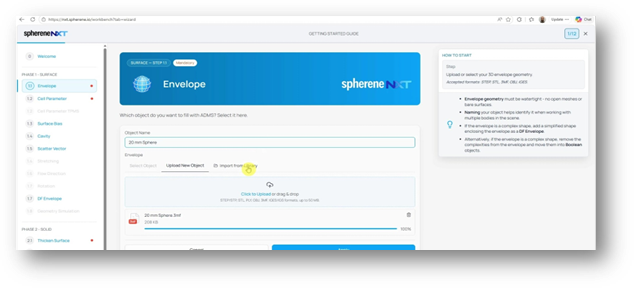
A file uploaded and ready to apply
- Watertight geometry: your envelope must have no open meshes or bare surfaces. The geometry with complex features such as surface texture is not favorable. Please remove those features from the envelope in advance, and you can choose to use our Boolean function to add them back afterwards.
- Naming your object helps identify it when working with multiple bodies in the scene.
Cell Parameter
Cell parameter controls the topology and scale of your structure: the fundamental unit size of the adaptive density cells distributed across your envelope.
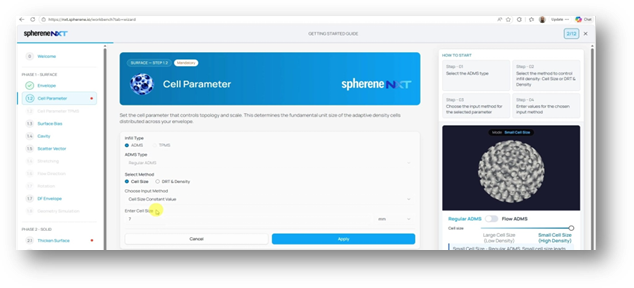
Cell Parameter, set to regular ADMS with a cell size of 7 mm
Notice Infill Type is already set to ADMS here. That choice was made earlier, when you picked Core ADMS as your wizard method. If you'd started from TPMS instead, this would show TPMS. The choices you do make on this screen are:
- ADMS Type: Regular ADMS by default. FlowADMS can't be selected in this wizard unless you do the Flow ADMS wizard.
- Select Method: Cell Size, the simpler option with just one parameter, or DRT & Density. Cell size is recommended. Cell size controls the local density of ADMS based on the size of a unit cell, while DRT & density controls it directly by the given density values assuming the local thickness is DRT.
- Choose Input Method: a constant value, a point map, or an imported file.
The suggested cell size aims for roughly 100 cells across your envelope. Smaller values mean higher density; larger values mean lower density. The preview on the right updates as you adjust it, so you can see the effect before applying.
The Rest of Phase 1
Envelope and Cell Parameter are the only mandatory steps in this phase. You'll also see Surface Bias, Cavity, Scatter Vector, Flow Direction, and DF Envelope listed; each shapes your structure further, but none are required to get a first result. We'll cover each in its own article.
Phase 2: Solid Thicken Surface
This step sets the wall thickness of the solid sphereneNXT generates. If you skip it, the engine applies a default offset of about 1 mm based on your cell parameter scale.
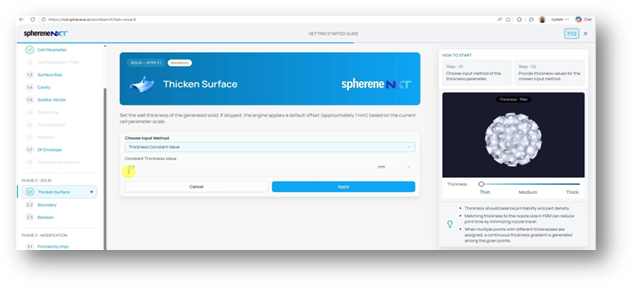
Thicken Surface, set to a constant 0.5 mm
- Balance: thickness should balance printability and part density.
- Nozzle size: matching thickness to your nozzle size in FDM can reduce print time by minimizing nozzle travel.
- Gradients: assigning different thicknesses at multiple points generates a continuous gradient between them.
Boundary and Boolean
Like Phase 1's optional steps, Boundary and Boolean live here too, for later. Neither is mandatory.
Phases 3, 4, and 5 at a Glance
Phase 3, Modification, holds Printability Improvement and the Volcano Modifier, both optional refinements once you have a base structure. Phase 4, Simulation is where you'll eventually run analysis, but at the time of writing it isn't available yet but coming soon. Phase 5, Compute, is where everything comes together.
Final Execution
This is the last mandatory step. Give your output a name, then set a few options before you compute.
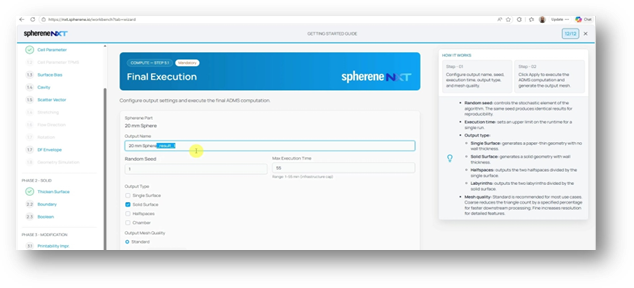
Final Execution, ready to run
- Random Seed: controls the stochastic element of the algorithm. The same seed produces identical results, useful for reproducibility.
- Max Execution Time: an upper limit on runtime for a single run, from 1 to 55 minutes.
- Output Type: Single Surface (paper thin, no wall thickness), Solid Surface (a solid geometry with wall thickness), Halfspaces (the two halfspaces divided by the single surface), or chambers (the two chambers divided by the solid surface).
- Output Mesh Quality: Standard works for most cases. Coarse reduces the triangle count for faster downstream processing; Fine increases resolution for detailed features.
Running the Computation
Click Compute and sphereneNXT to prepare your geometry, then run the calculation. You can watch progress in real time or click Abort Computation if you need to stop.
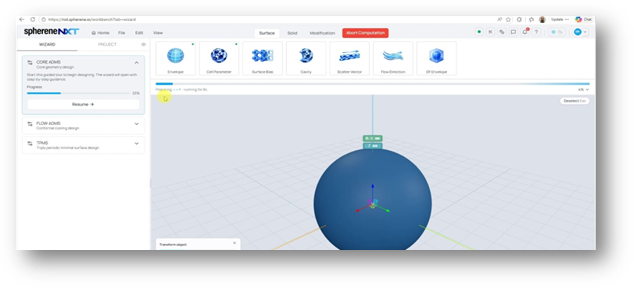
Preparing and running, a few seconds in
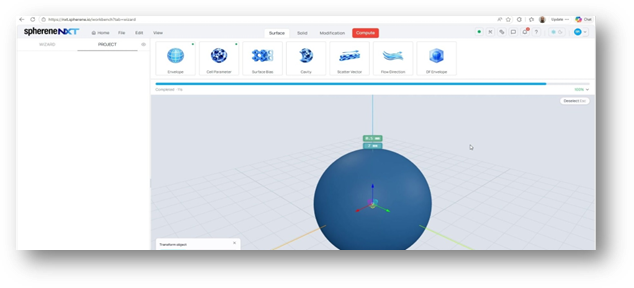
Completed in 11 seconds
Viewing Your Result
Once compute finishes, switch to the Project tab of the left side panel on the workspace to see everything that was built: your imported envelope, the cell size and thickness values you set, and the final result. Toggle off the envelope layer if it's in the way, and there's your structure.
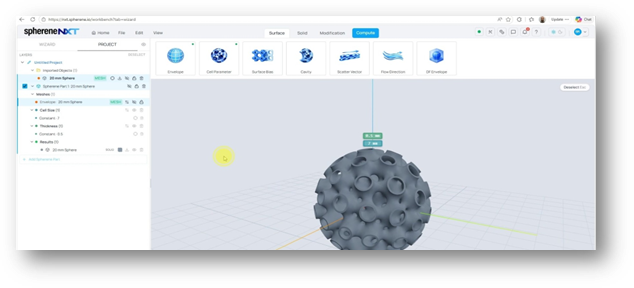
The finished lattice sphere, with the layer tree on the left
That's a full pass through the wizard, from an empty envelope to a computed structure, using only the two mandatory steps in each phase. Everything else, Surface Bias, Cavity, Scatter Vector, and the rest, is there whenever you're ready to refine further.
Quick Reference
A cheat sheet for the steps covered above, and which ones you can't skip.
|
Step |
What It Does |
Mandatory? |
|
Envelope |
The CAD file you upload as the base shape sphereneNXT fills with structure. |
Yes |
|
Cell Parameter |
Sets the topology and scale, the size of the unit cells across your envelope. |
Yes |
|
Surface Bias, Cavity, Scatter Vector, Flow Direction, DF Envelope |
Optional refinements to the surface definition. |
No |
|
Thicken Surface |
Sets the wall thickness of the solid. Defaults to about 1 mm if skipped. |
Yes |
|
Boundary, Boolean |
Optional solid-phase adjustments. |
No |
|
Printability Impr., Volcano Modifier |
Optional modification phase refinements. |
No |
|
Simulation / Analysis |
Not available yet at the time of writing. |
N/A |
|
Final Execution |
Configures output name, seed, execution time, output type, and mesh quality, then runs the computation. |
Yes |