
Before You Dive In
The envelope is the first thing you touch in a new sphereneNXT project, and it's not optional. It's how you tell the engine which shapes your internal structure should fill. Without it, there's nothing to compute.
One thing worth clearing up early: sphereneNXT doesn't create CAD geometry for you. You always bring in your own CAD file and use it as the envelope, whether you're working through the main workbench or starting from the Wizard. Think of the envelope as the outer boundary sphereneNXT builds inside of, not something the software generates on its own.
What the Envelope Actually Does
When you click the Envelope button and assign an object to it, you're telling sphereneNXT: apply my internal structure inside this shape. That object becomes the container for everything else you do afterward; cell parameters, surface bias, cavities, and so on all reference back to it.
Tip: You'll see a small red dot on the Envelope and Cell Parameter icons until they're set up. That's sphereneNXT's way of flagging which steps are still required before you can compute.
Opening the Envelope Panel
In a fresh project, look at the row of icons above the 3D viewer. The envelope sits first, and it's the one you need to handle before anything else lights up.
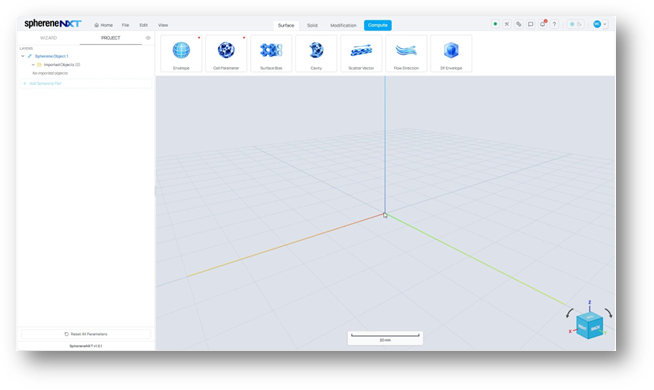
A new sphereneNXT project. No objects have been imported yet, so the Envelope icon is the natural starting point.
Before You Import Anything
Click Envelope and the Define Envelope panel opens. If you haven't imported an object yet, notice that Select Object is greyed out. There's simply nothing to select. You'll need to upload or import a CAD file first before that tab becomes usable.
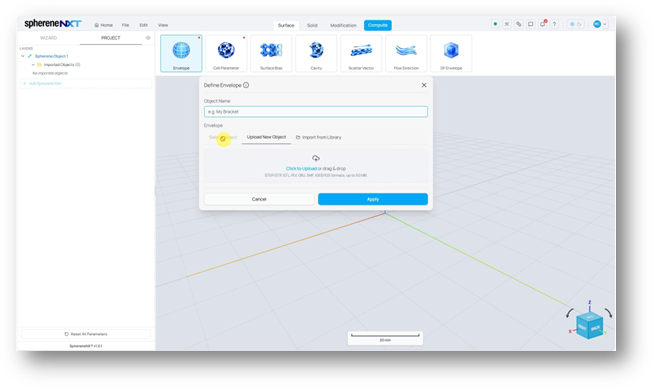
With no CAD file imported yet, the Select Object tab is disabled and can't be clicked.
Bringing In Your CAD File
There are two ways to get your CAD file into sphereneNXT.
Uploading Directly from the Envelope Panel
The Define Envelope panel has an Upload New Object Tab. Click to upload or drag and drop your file straight in. sphereneNXT accepts STEP, STP, PLY, OBJ, 3MF, IGES, and IGS formats, up to 50 MB.
Importing from the File Menu
If you'd rather bring your file in before opening the envelope panel, go to File, then Import from Computer.
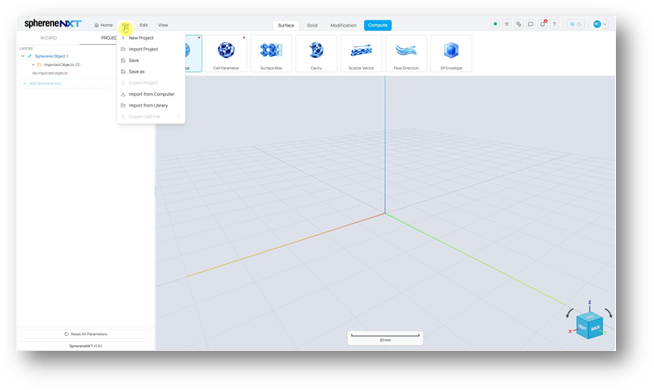
The File menu, with Import from Computer as one of two import options alongside Import from Library.
This opens your computer file browser, where you can navigate to and select your CAD file.
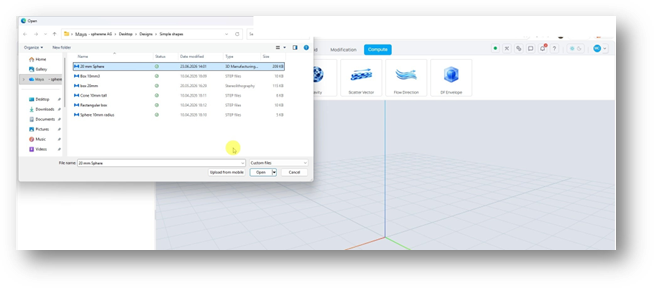
Selecting a CAD file to import. Any format in the list, like STEP files or this sample sphere, works as an envelope.
Selecting Your Imported Object as the Envelope
Once your file is imported, it shows up under Imported Objects in the left-hand panel, tagged as a MESH/Brep depending on the import file format. Importing it is only half the job though; it isn't an envelope yet until you assign it as one.
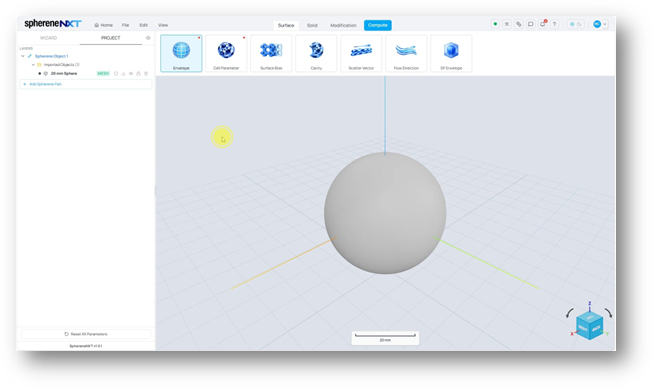
The imported object appears under Imported Objects, but it hasn't been assigned as the envelope yet.
Open the Define Envelope panel. Select Object is now active. Choose your object from the Entity Selection list, or click the mesh directly in the 3D viewer, then hit Apply.
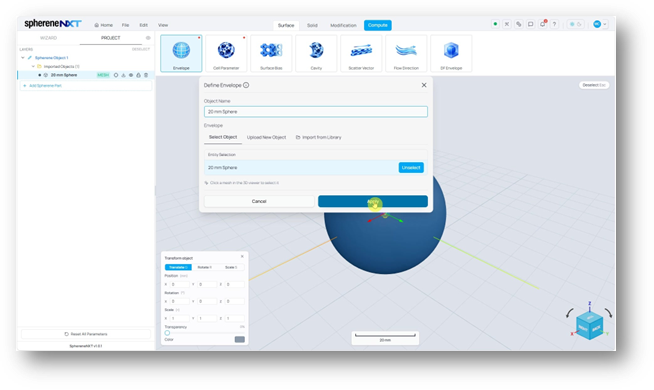
With the object imported, Select Object becomes available. Pick your mesh and click Apply to assign it as the envelope.
Tip: You can also click directly on the shape in the 3D viewer instead of picking it from the list. Either way selects the same object.
Your Envelope Is Set
Once applied, the object changes color in the viewer and moves into your Spherene Part under Meshes, labeled as Envelope. That's your confirmation that sphereneNXT now knows what shape to build inside.
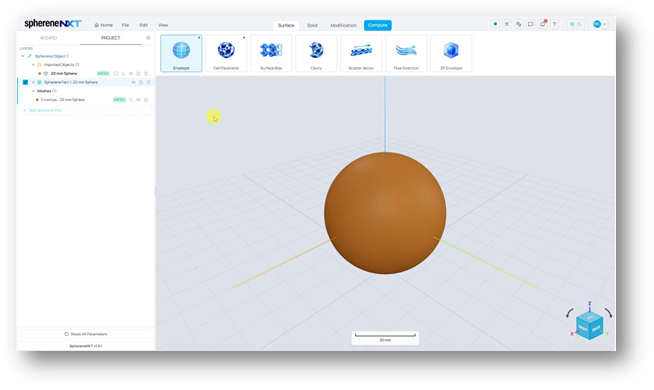
The envelope is applied. The object turns a solid color and appears under Meshes as Envelope: 20 mm Sphere.
A Couple of Extras
Importing from Your Library
Alongside Select Object and Upload New Object, you'll also find an Import from Library tab. This pulls in CAD files you've already saved to your sphereneNXT library, so you don't need to upload the same file twice across projects.
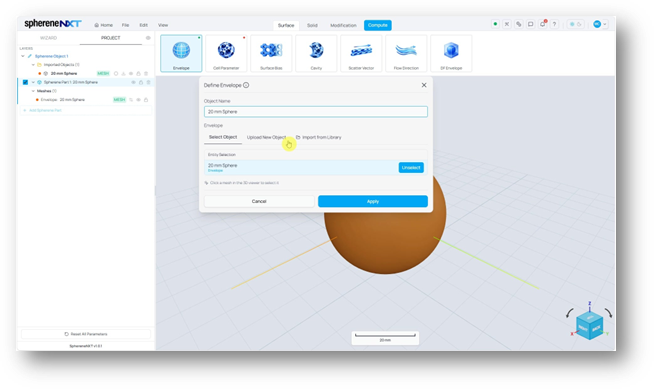
The Define Envelope panel with all three options visible: Select Object, Upload New Object, and Import from Library.
Renaming Your Object
The Object Name field at the top of the panel isn't locked to whatever your file was originally called. Click into it and rename it to something that'll make sense later, especially handy once a project has several imported objects.
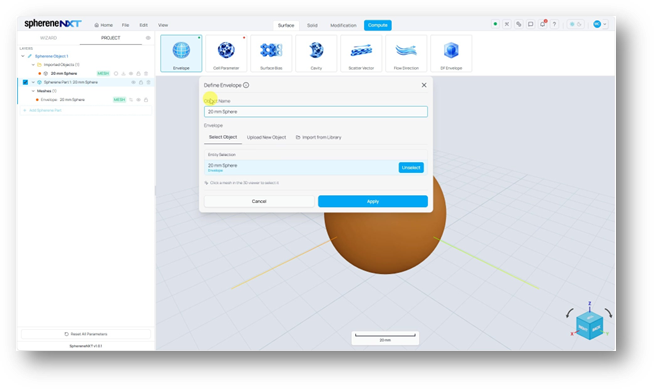
The Object Name field can be edited at any time, independent of the original file name.
Once you're happy with the name, make sure your object is still selected and click Apply. That's what locks in your envelope and clears the way for Cell Parameter, the next step in setting up your structure, which we cover in a separate article.
Quick Reference
|
Step |
What It Does |
Where to Find It |
|
Open the panel |
Opens Define Envelope so you can set or change your envelope. |
Icon row above the 3D viewer |
|
Upload New Object |
Uploads a CAD file straight from your computer as the envelope. |
Define Envelope panel |
|
Import from Computer + Select Object
|
Alternate route to bring in a CAD file before opening the envelope panel. Assigns an already-imported object as the envelope. Select object is disabled until something's imported. |
File menu + Define Envelope panel
|
|
Import from Library |
Reuses a CAD file already saved to your library. |
Define Envelope panel |
|
Object Name |
Renames the imported object to whatever makes sense for your project. |
Top of Define Envelope panel |