
What the Printability Improvement Tool Does
Printability Improvement lives in the Modification tab. It's built to help a computed part hold up better in an 3D printer, and it works on whatever result you already have, so cell parameters and thickness need to be set up beforehand, just like with every other sphereneNXT feature.
The example here is a bracket shaped part with three computed results sitting in the Results list: Normal, Fix Overhangs, and Z Thickness Factor 2. The first is the untouched result, and the other two show what each Printability Improvement setting does to it.
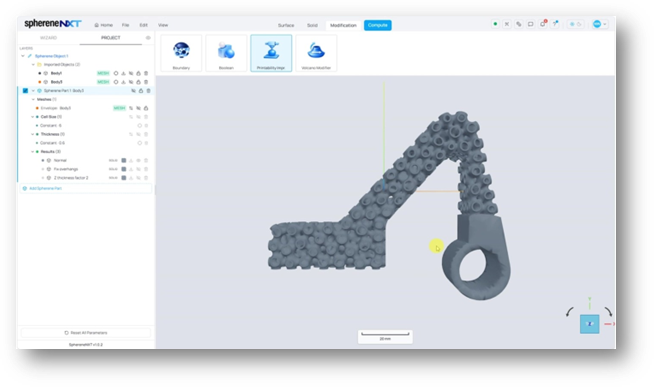
A bracket part with three computed results: Normal, Fix Overhangs, and Z Thickness Factor 2.
Opening the Printability Improvement Dialog
Clicking Printability Impr. opens a small dialog with two settings: Z Thickness Factor, which defaults to 1, and Fix. Overhangs, which defaults to off. Hovering over the tool beforehand shows a short description: Optimize for AM printing constraints, which is a good summary of what both settings are for.
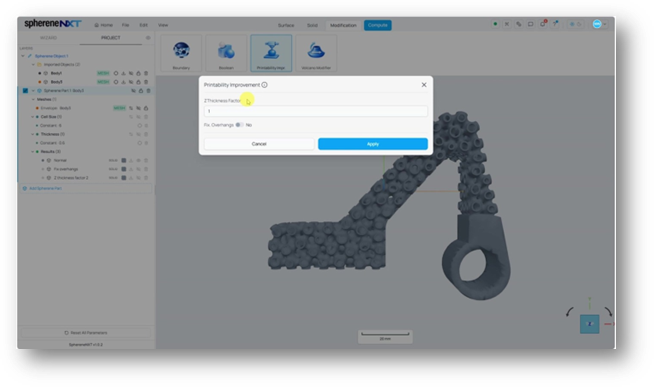
The Printability Improvement dialog, with Z Thickness Factor at its default of 1 and Fix. Overhangs switched off.
Fixing Overhangs (Experimental)
Turning Fix. Overhangs on and applying it recomputes the mesh with small adjustments aimed at easing overhang printing on 3D printers. The changes are subtle where only the overhanged edges are tilted up that improves printability.
Tip: Fix Overhangs is still in an experimental phase. Treat it as a starting point, and take a close look at the result before relying on it for an actual print.
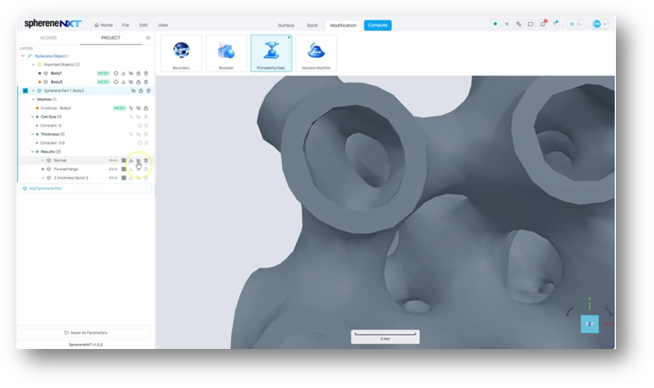
Zoomed into the Normal result, before Fix Overhangs is applied.
The same area after Fix Overhangs, smoothed slightly to ease overhang printing.
Adjusting the Z Thickness Factor
Z Thickness Factor has a much bigger effect than fix overhang. It would thicken up all the edges or planes that is perpendicular to the build direction, making overhanging regions more robust for printing. Higher values increase material usage and part weight.
Setting it to 2 and applying it thickens the structure in the Z direction, adding material to the walls that run along that axis rather than stretching or rescaling the part as a whole. Comparing the same rod segment before and after makes this clear: the outline and hole spacing stay put, and the walls simply get thicker.
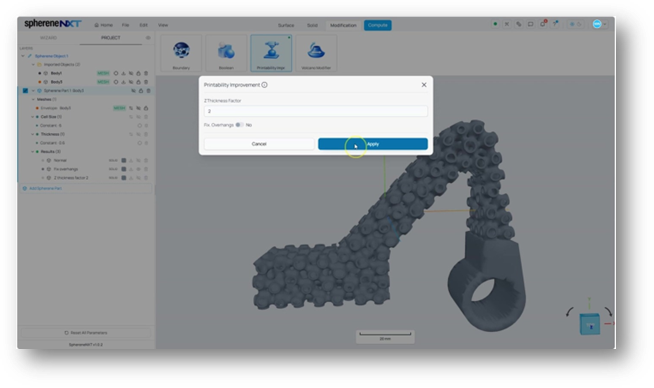
Z Thickness Factor set to 2, with Fix. Overhangs left off.
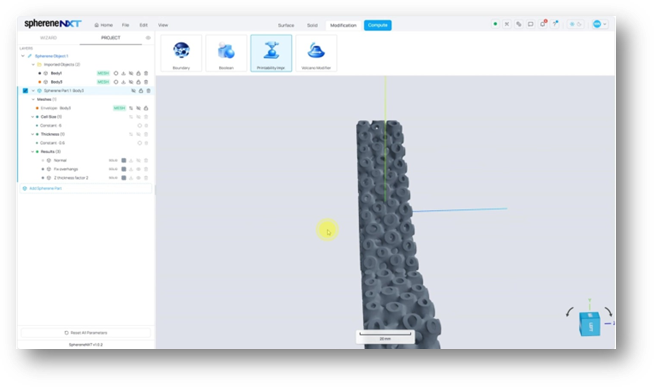
The same rod segment after a Z Thickness Factor of 2: the walls are thicker in Z, not stretched.
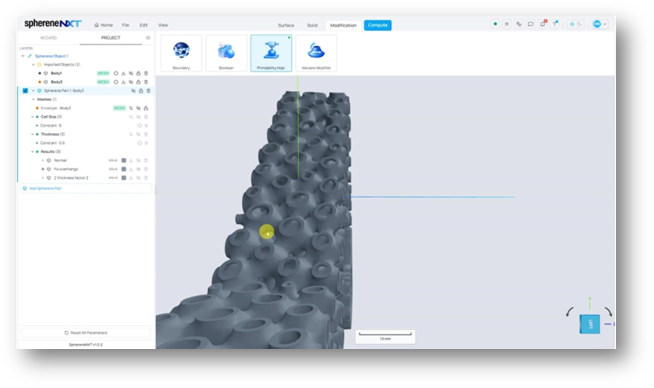
Switching to a top down view with Z pointing up makes the added thickness even easier to see, running consistently through the structure.
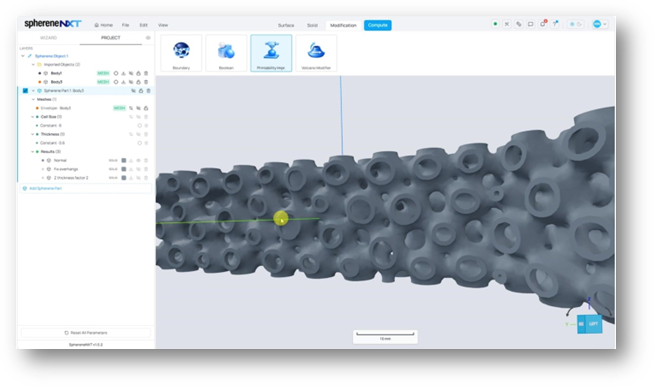
Viewed from the top with Z pointing up, the added thickness runs clearly through the structure.
Tip: A higher Z Thickness Factor can help prevent print failures on FDM printers that print without support material, since it adds extra strength along the build direction. But it often comes with an increase in the printed weight. Z-thickness factor = 1.64 is recommended for FDM printing.
Quick Reference
|
Step |
What It Does |
Where to Find It |
|
Open Printability Improvement |
Opens the dialog for improving printability |
Modification tab > Printability Impr. |
|
Set Z Thickness Factor |
Thickens the structure's walls that is perpendicular to the build direction |
Printability Improvement dialog |
|
Turn on Fix. Overhangs |
Tilted the overhang edges up (experimental) |
Printability Improvement dialog |
|
Apply |
Computes a new result you can compare against the original |
Printability Improvement dialog |