
Before You Dive In
Cavity carves an open space into your structure using a second object, not your envelope itself. Since your first imported object is already doing the job of your envelope, cavity needs a shape of its own, something like a sphere, to define the space it carves out. This article covers what cavity does, why you need that second object, and how front and back cavity give you two different results from the same imported shape.
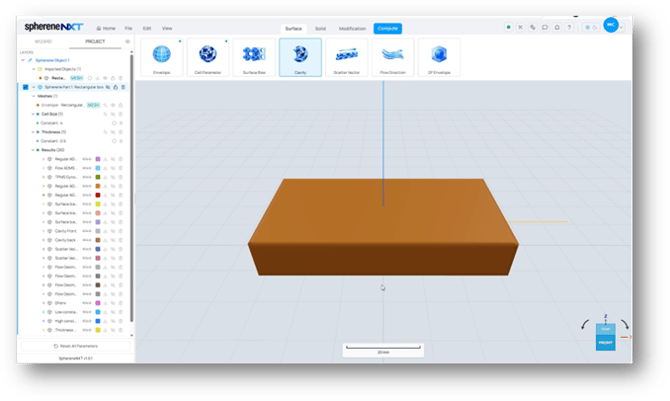
Cavity sits between Surface Bias and Scatter Vector in the icon row above the 3D viewer.
What Cavity Actually Does
Click the Cavity icon and its definition appears right there in the panel: it carves spaces into the infill structure, independently controllable per chamber. The cavity you define connects with whichever chamber you select, which makes it a fast way to design inlets and outlets for heat exchangers. That's just a one-use case though. Anything that calls for an open channel or pocket cut into your structure can use cavity.
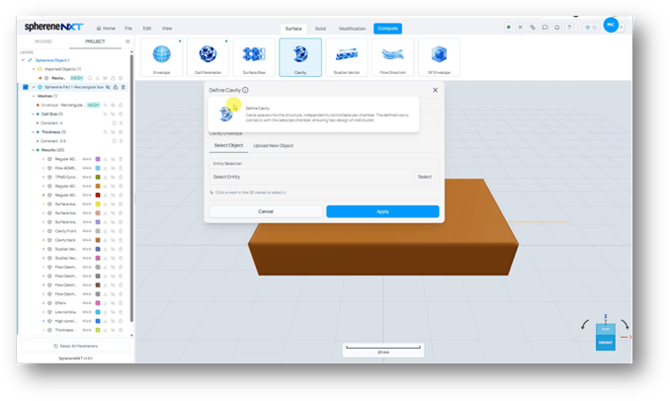
The Define Cavity panel, with its built-in explanation of what cavity does.
Tip: “Chamber” here refers to the two sides of your structure's minimal surface, the same two chambers you can shift between with surface bias. The defined cavity will be connected to one of them independently and isolated from the other.
Bringing In a Second Object
Your envelope already uses your first imported object, so cavity needs an object of its own to define the space it carves out. If you don't have a free object sitting in your project, you'll need to upload one before you can move forward.
Choosing Front Cavity or Back Cavity
Before uploading, pick Front Cavity or Back Cavity at the top of the panel. Both create a cavity in the same location using the same object, but only connect to the selected chamber. Which one is right for you depends entirely on what you're designing.
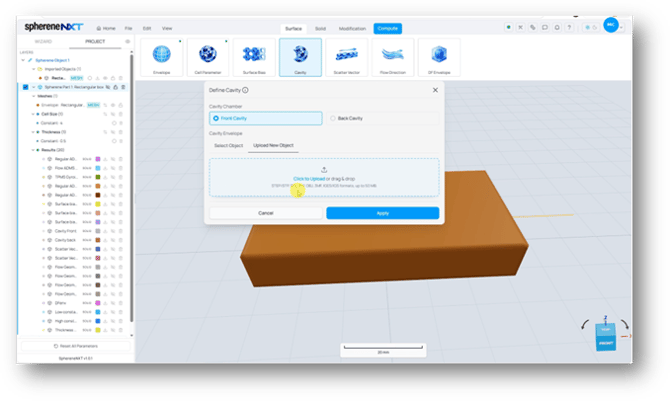
Cavity Chamber, with Front Cavity selected, and the Upload New Object tab open with its drop zone.
Uploading Your Object
Switch to Upload New Object, then click to upload or drag a file in. Cavity accepts the same formats as your envelope: STEP, STP, STL, PLY, OBJ, 3MF, IGES, and IGS, up to 50 MB.
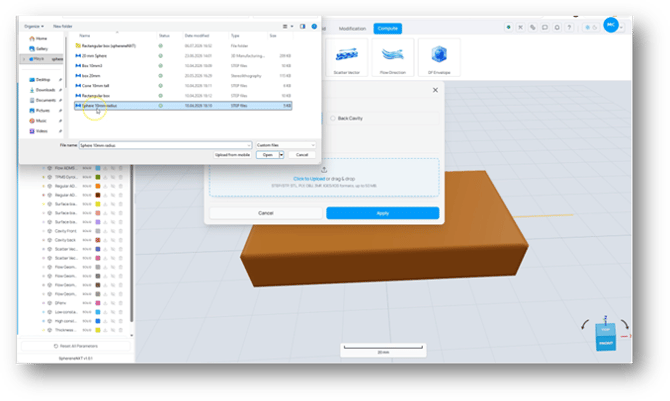
Select a 10 mm radius sphere to import from the file browser.
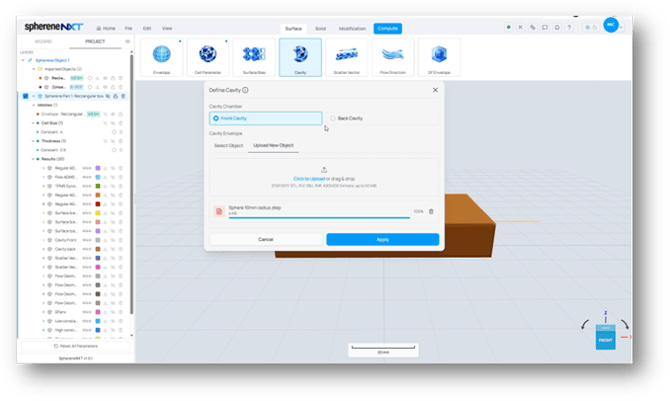
The sphere was uploaded and ready. Click Apply to define the cavity.
Tip: If you've already got an object for cavities sitting in your project, you don't need to upload anything new. Just switch to the Select Object tab and pick it up from the list instead.
Seeing Your Cavity Take Shape
Once applied, your cavity sits exactly where your second object was positioned inside the envelope. Turning up your envelope's transparency shows this clearly; the cavity carved into the surface right where the sphere sat.
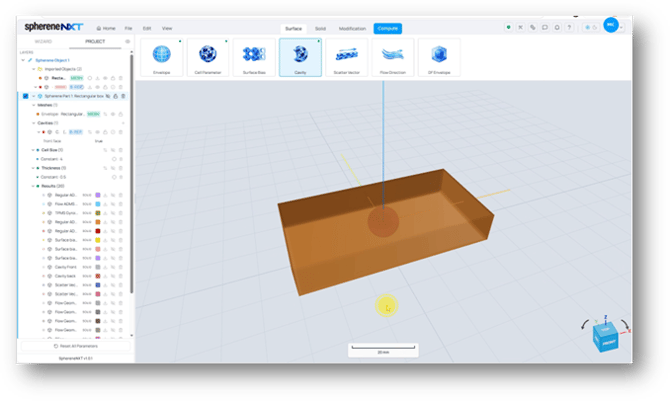
With the envelope's transparency turned up, the cavity carved by the sphere is visible right where the object was placed.
From here, name your output and compute like normal.
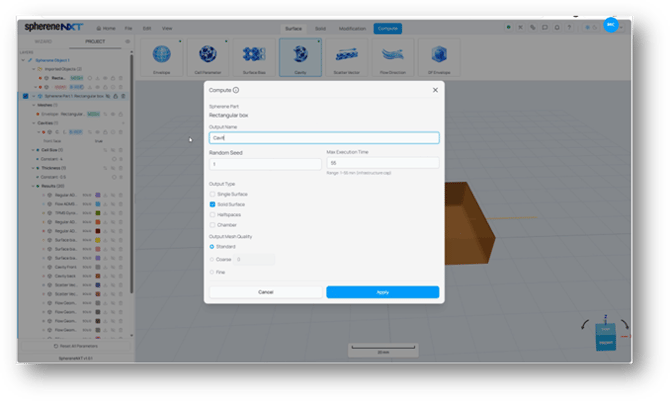 Naming the output before computing.
Comparing Front and Back Cavity
Here's the same sphere, in the same position, computed twice: once as a front cavity and once as a back cavity.
Front Cavity Result
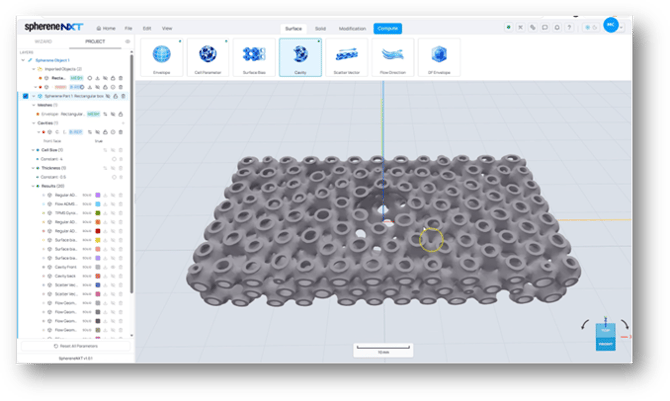
The front cavity results. A single round opening sits where the sphere carved into the structure.
Back Cavity Result
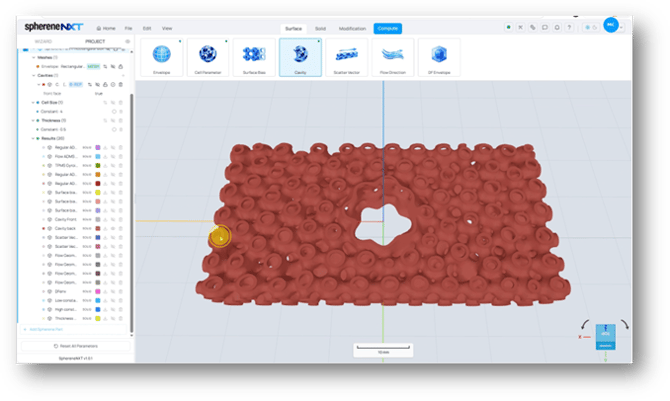
The back cavity result, using the same object and position. A different, larger opening appears instead, since back cavity closes off the other chamber.
Tip: In a two-fluid heat exchanger, you can use front chamber and front cavity for hot water and use back chamber and back cavity for cold water. This ensures the cavities of hot and cold water will always be isolated to each other and connected to the correct chamber.
Quick Reference
A cheat sheet for everything covered above, in case you just need a quick reminder later.
|
Option |
What It Does |
Where to Find It |
|
Cavity |
Carves an open space into your structure using a second object, connected to whichever chamber you select. |
Icon row above the 3D viewer |
|
Front Cavity |
Defines the front chamber that cavity connects to while isolates from the back chamber. |
Cavity Chamber |
|
Back Cavity |
Defines the back chamber that cavity connects to while isolates from the front chamber. |
Cavity Chamber |
|
Select Object |
Use an object already in your project to define the cavity. |
Cavity Envelope |
|
Upload New Object |
Brings in a new object to define the cavity. Accepts STEP, STP, STL, PLY, OBJ, 3MF, IGES, and IGS, up to 50 MB. |
Cavity Envelope |