
Beams
Cell Parameter now offers a third Infill Type alongside ADMS and TPMS: Beams. Where ADMS and TPMS build continuous surfaces, Beams builds an open network of cylindrical bars that connect at thickened joints, called nodes. It is the kind of strut-and-joint structure most people picture when they hear the word lattice.
What sets sphereneNXT's Beams apart from a textbook lattice is that the cells are stochastic and surface conformal. Instead of stamping one repeating unit cell across the part, cells of lattices are aperiodically distributed to ensure a good match of the generated lattice to the envelope surface. This grants clean-up surface beam lattice instead of breaking beams.
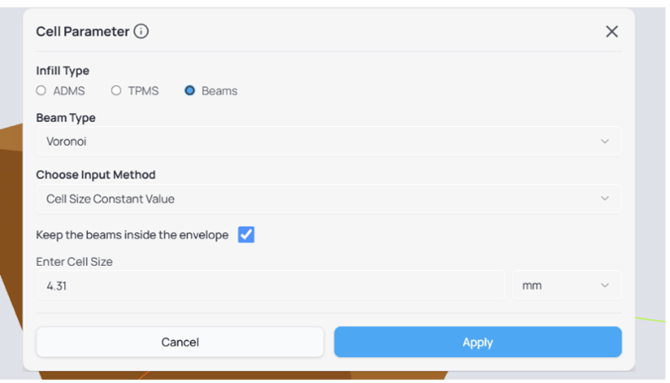
Cell Parameter with Infill Type set to Beams.
How Beams Differ from ADMS and TPMS
ADMS and TPMS are surface-based. They divide space with a continuous minimal surface, and load travels surface to surface across the whole part. Beams is strut-based: load travels along discrete bars and passes through the joints where those bars meet. That single difference drives everything else.
- Aperiodic. Because the cells are stochastic rather than a repeating grid, the network does not favor one direction the way an ordered lattice can, so its behavior stays close to uniform in every direction.
- Surface conformal. The bars adapt to the envelope with no break-points at the surface. That gives a continuous loading path and cleaner printability than a typical beam lattice that gets sliced off at the boundary.
- Lower mechanical strength. Load concentrates at the joints, which is usually where a beam lattice fails first. Under mechanical loading, Beams carries less than the surface-to-surface ADMS and TPMS structures, and it is less stiff.
- Not self-supporting. Unlike ADMS, Beams does not minimize its own print supports, additional support structure might be needed for certain printing technologies. In some workflows, this beam structure is used the other way around, as a printed support structure of other objects.
None of this makes one infill type better than another. They solve different problems, and the right choice is the one that fits the job in front of you.
When to Use Beams
Reach for Beams when reducing weight or providing an open structural network matters more than maximum stiffness or strength. Common uses:
- Light-weighting where the part is not strength-limited
- Energy absorption
- Printed support structures
- Compliant or elastic behavior, and open, visually driven designs
If the part has to carry heavy mechanical load, a surface-based structure will usually serve you better. Beams is the tool for the cases in between.
Setting Up a Beam Structure
The workflow is the same as every other structure in sphereneNXT: import and assign your envelope, set your parameters, then compute. Beams simply swap in their own set of controls.
Choosing Beams as the Infill Type
In Cell Parameter, set Infill Type to Beams. This is the same radio group that holds ADMS and TPMS. Selecting it reveals the Beam Type dropdown and the beam-specific inputs below it.
Picking a Beam Type
Beam Type gives you three ways to generate the network: Voronoi, Tetrahedral, and Stellated. Each starts from the same stochastic point layout but connects it differently, so they look and behave differently at the same cell size.
- Voronoi produces open, organic cells.
- Tetrahedral builds a fully triangulated network, the most heavily braced of the three.
- Stellated adds radiating struts for a dense, star-like pattern.
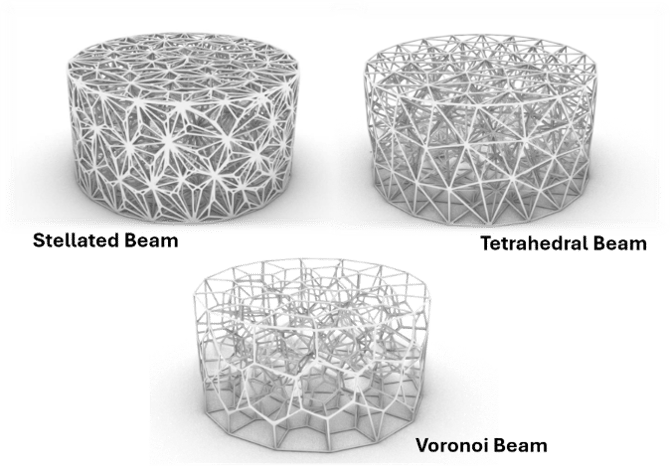
The three beam types at a uniform cell size: Stellated, Tetrahedral, and Voronoi.
Keeping Beams Inside the Envelope
The Keep the beams inside the envelope checkbox controls whether the result is clipped to your envelope. With it on, the network is intersected with the envelope so nothing extends past the surface. With it off, the beams are left as generated and can sit slightly out of the shape.
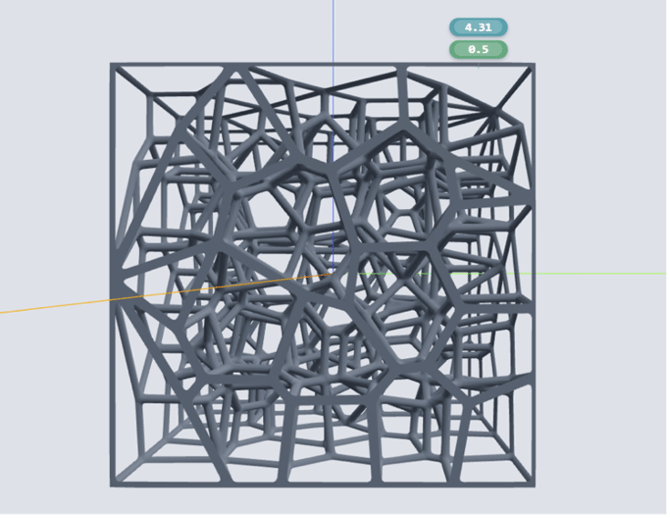
A Voronoi beam at uniform cell size, intersected with the envelope so the network stops at the surface.
Cell Size, Thickness, and Node Diameter
Beams uses three inputs:
- Cell Size sets the spacing of the network. A smaller value packs more, finer cells into the same space.
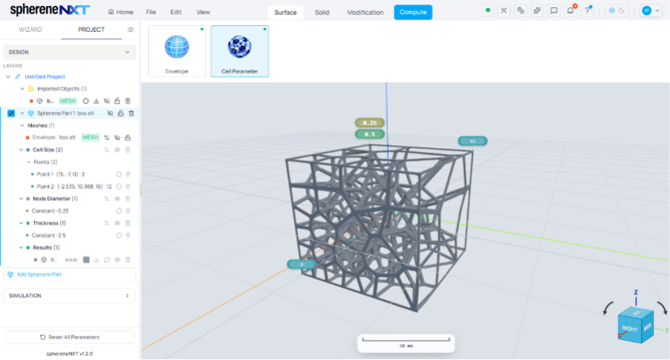
Voronoi beam with a cell size gradient
- Thickness sets the diameter of the bars themselves.
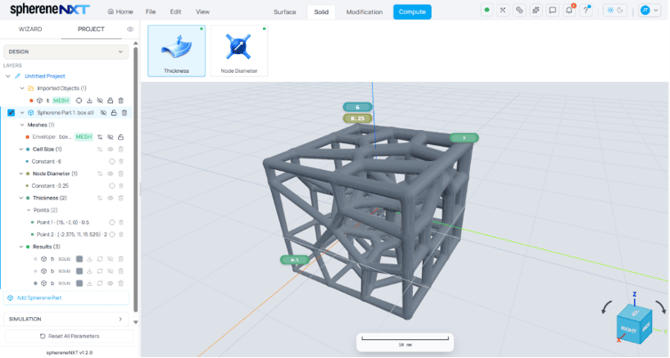
Voronoi beam with a thickness gradient
- Node Diameter sets how thick the joints are where bars meet. It is the one input unique to Beams, and it produces the thickened crossings you see across the network.
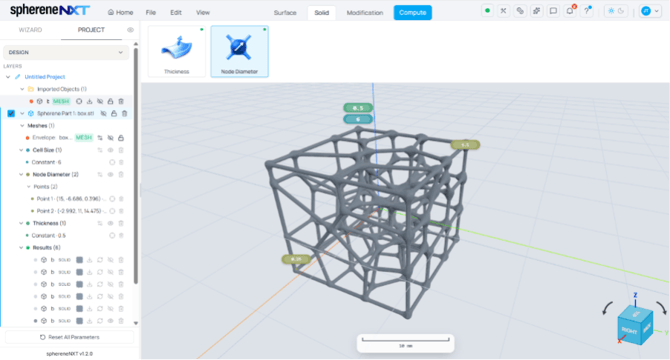
A Voronoi beam with a node diameter gradient, thickening the joints across the part.
Grading Values Across the Part
Beams does not take a density input the way ADMS does. Instead it works from cell size, and that value can be spatially adaptive: you can grade Cell Size, Thickness, and Node Diameter across the part rather than holding each one constant, the same way you would with a cell size point map elsewhere in sphereneNXT.
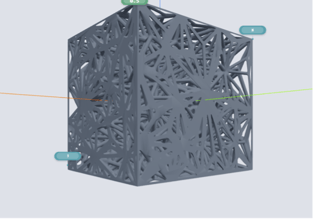
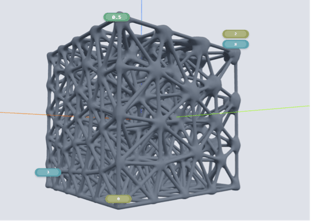
A cell size gradient on a Stellated beam, and a combined cell size and node diameter gradient on a Tetrahedral beam.
Compute
With your Beam Type and inputs set, click Apply, then Compute, just like any other structure. Building a beam network means wrapping tubes around a set of line segments, which is lighter work than resolving a full minimal surface, so Beams usually computes faster than ADMS or TPMS.
Keep Thickness and Node Diameter in Check
One rule keeps a beam result clean: both Thickness and Node Diameter need to stay below a quarter of the Cell Size. Push either past that and the bars and joints crowd each other faster than the network can resolve, and the structure will not compute cleanly.
Tip: Keep Thickness and Node Diameter under Cell Size divided by four. If a result looks tangled or fails to build, this ratio is the first thing to check.
Beams supports two modifications: Boundary and Boolean. Other sphereneNXT tools are not set up to work with beam structures, so plan your design around these two.
There is one thing to remember for Boundary. With a beam structure, keep both Front Chamber and Back Chamber turned on so each side stays closed.
|
Step |
What It Does |
Where to Find It |
|
Set Infill Type to Beams |
Switches from a surface structure to a stochastic beam lattice |
Cell Parameter panel |
|
Choose Beam Type |
Picks how the network connects: Voronoi, Tetrahedral, or Stellated |
Cell Parameter panel |
|
Keep the beams inside the envelope |
Clips the network to the envelope so nothing extends past the surface |
Cell Parameter panel |
|
Set Cell Size |
Sets the spacing and size of the cells |
Cell Parameter panel |
|
Set Thickness |
Sets the diameter of the bars |
Cell Parameter panel |
|
Set Node Diameter |
Sets the thickness of the joints where bars meet |
Cell Parameter panel |
|
Grade values across the part |
Varies cell size, thickness, or node diameter spatially instead of holding them constant |
Cell Parameter panel |
|
Apply Boundary or Boolean |
The two modifications beams supports; keep both chambers on for Boundary |
Modification tab |