
Thicken Surface gives thickness to the geometry you've already built, turning what would otherwise be an open lattice surface into solid walls. It lives under the Solid tab rather than Surface, since it works on the part after your structure has already taken shape.
Like the other input-method tools you've already seen, such as Surface Bias or Cell Size, it needs your envelope and cell parameters set up first. Without those in place, there's nothing for Thicken Surface to act on and Compute won't run.
What Thicken Surface Actually Does
You get three ways to define thickness: a constant value applied everywhere, a point map where you set different thickness values at different locations, or importing a points map from a CSV file, handy if you already have data from a simulation or a pressure map. The CSV file should has the same format as cell parameter or surface bias. There will be four values in each row, including X/Y/Z coordinates of the points and the corresponding thickness.
Tip: If you're printing FDM, a common approach is to set the constant thickness value to match the diameter of your nozzle. That keeps the printed walls consistent with what the printer can produce and saves printing time from jumping nozzles.
Opening Thicken Surface
Click over to the Solid TAB on the top navigation of the workspace. Thicken Surface is the only tile there, and hovering over it reminds you what it does.
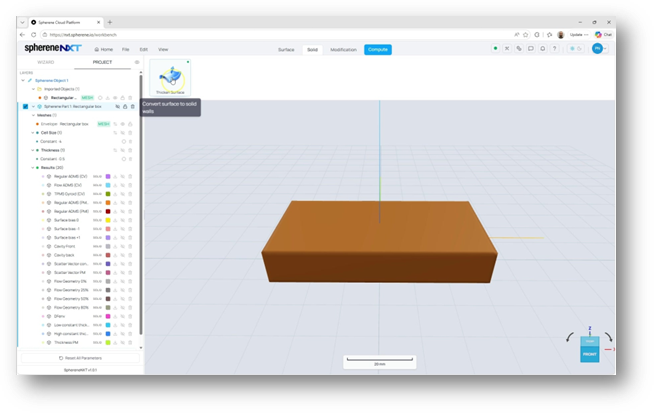
Thicken Surface sits under the Solid tab and converts surface to solid walls.
Clicking opens the Thicken Surface panel with a Choose Input Method dropdown. Opening that dropdown shows all three options at once.
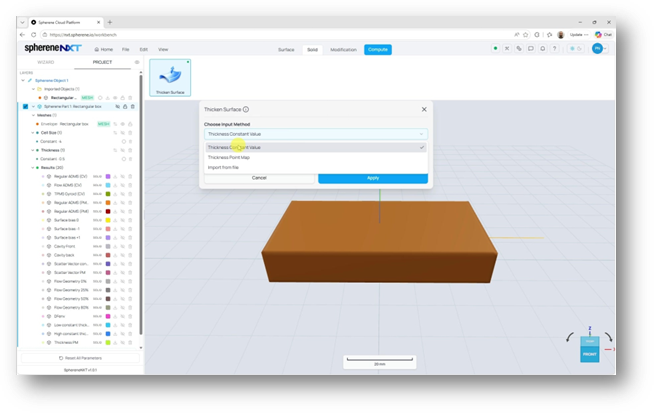
Thickness Constant Value, Thickness Point Map, and Import from file, all in one dropdown.
Setting a Constant Thickness
Thickness Constant Value is the simplest option and the one you'll probably reach for most. Type in a value and every wall in your part gets the same thickness.
Entering a Value
With the Thickness Constant Value selected, type your number into the Constant Thickness Value field. This example uses 0.2 mm, a fairly thin wall for this shape.
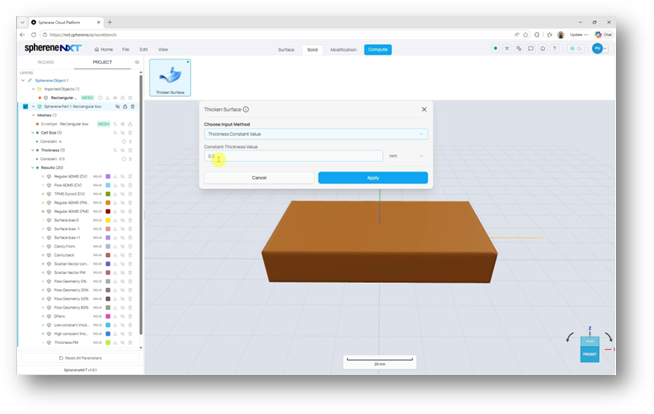
A constant thickness value of 0.2 mm entered before applying.
Naming and Running the Computation
Click Apply, then head to Compute. Give the output a name that'll make sense later. This one's named Thickness constant low, since 0.2 mm counts as a low thickness for this size of part.
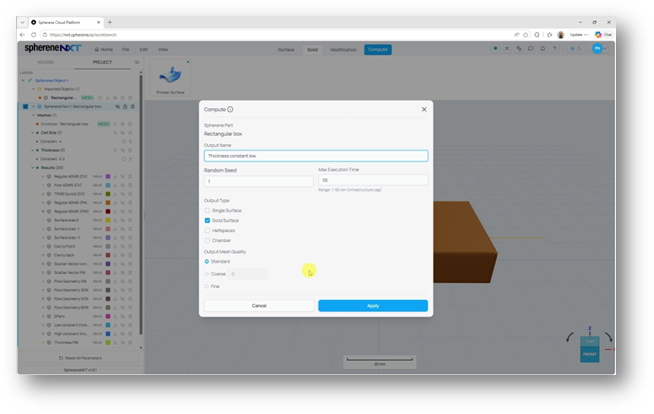
Naming the computation, Thickness constant low before running it.
Comparing Two Thicknesses
Running the same process twice, once at a low value and once higher, makes the effect of thickness easy to see.
A Low Thickness (0.2 mm)
At 0.2 mm, the result is a thinner, more delicate structure with the openings in the lattice still clearly visible.
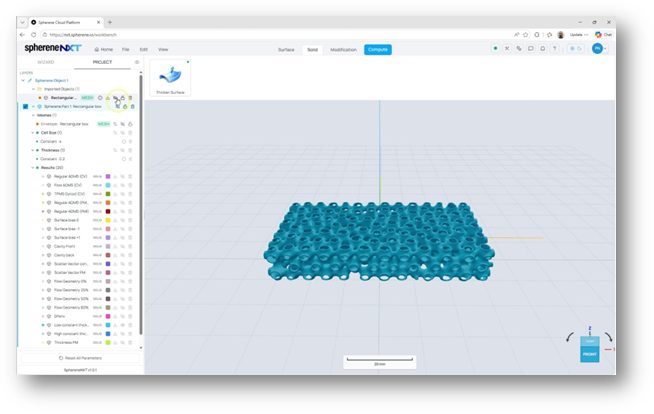
The result at a constant thickness of 0.2 mm.
A Higher Thickness (0.8 mm)
At 0.8 mm, the underlying geometry is exactly the same, but the walls are noticeably bulkier, and the openings shrink. The thickness gets added from both sides of the original surface, so a higher value affects the whole structure evenly.
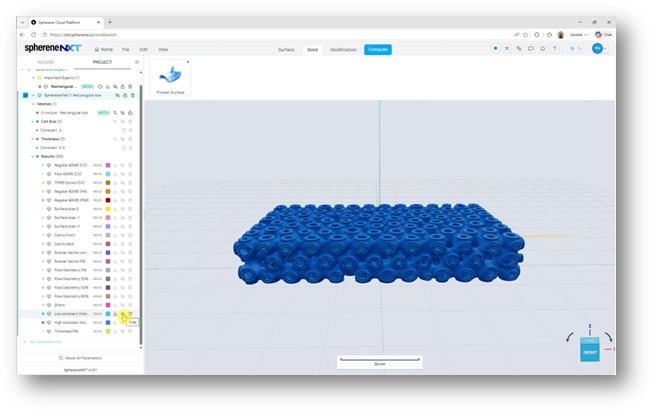
The same geometry at a constant thickness of 0.8 mm, clearly bulkier than the 0.2 mm version.
Using a Thickness Point Map
A constant value works fine when every part of your structure needs the same wall thickness. A point map is what you reach for when it doesn't, letting thickness taper gradually from one area to another instead of jumping abruptly.
Switching Input Methods
Open Thicken Surface again and switch Choose Input Method to Thickness Point Map. This replaces the single value field with a table where you can add as many points as you need.
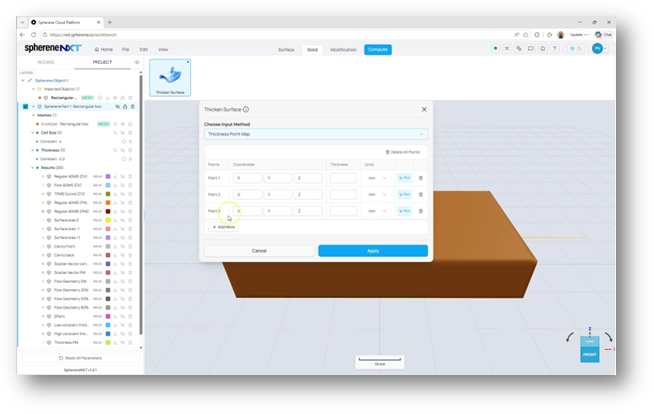
The Thickness Point Map table, with a Pick button, to place each point directly in the 3D viewer.
Placing Points and Assigning Thickness
Click Pick for each point and select a location on your part in the viewer, then type in a thickness value for that point. This example uses five points spread from left to right, with thickness climbing steadily from 0.1 to 1, a tenfold difference between the two ends.
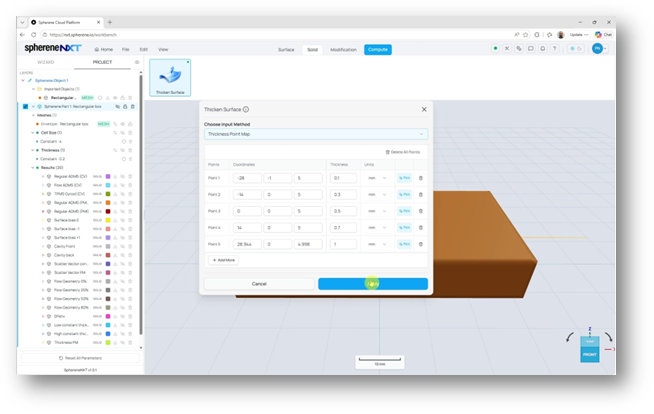
Five points across the part with thickness values of 0.1, 0.3, 0.5, 0.7, and 1.
Tip: Switching to a point map replaces whatever constant value you had before. sphereneNXT will ask you to confirm before it overwrites it, so you won't lose that setting by accident.
Naming and Computing the Gradient
Confirm the replacement, then click Apply and head to Compute as before. This result is named Thickness gradient PM, PM for point map, so it's easy to tell apart from the constant-value runs.
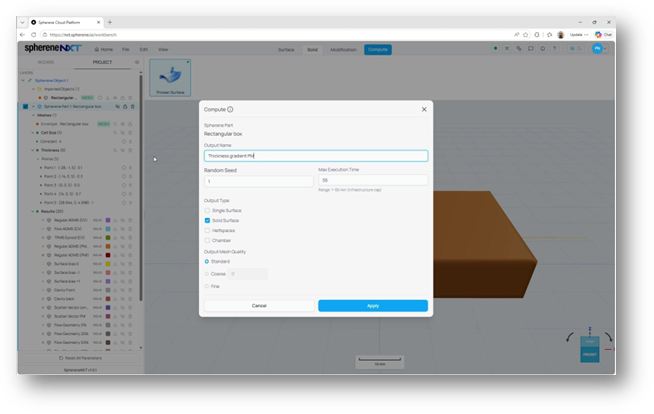
Naming the computation Thickness gradient PM before running it.
Reading the Result
Hide the envelope and you can see the thickness change happening smoothly across the part. The left side, closest to 0.1 point, stays thin and open. Moving right, the walls gradually thicken until the material at the far end is noticeably denser.
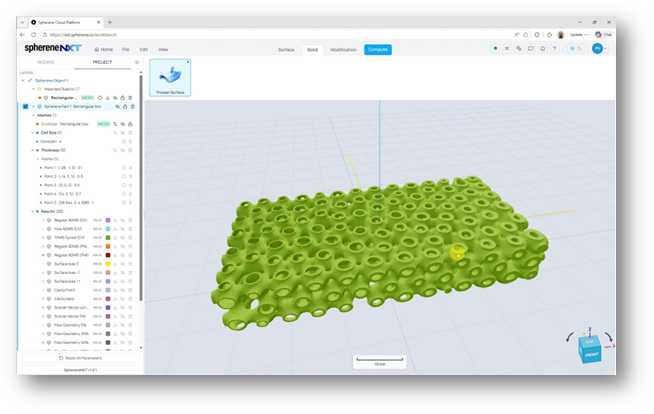
The finished point map results. Thickness increases smoothly from left to right, with no sharp edges anywhere.
The important part here isn't just that the thickness changes; it's that it changes smoothly. There's no visible seam or sharp transition anywhere between the five points, even with a tenfold difference between the thinnest and thickest ends.
Quick Reference
|
Step |
What It Does |
Where to Find It |
|
Open the tool |
Opens Thicken Surface so you can set wall thickness. |
Solid tab above the 3D viewer |
|
Thickness Constant Value |
Applies one thickness value to the whole part. |
Choose Input Method dropdown |
|
Thickness Point Map |
Lets thickness change gradually between points you place. |
Choose Input Method dropdown |
|
Import from file |
Reuses a thickness map from a CSV, like a pressure map. |
Choose Input Method dropdown |
|
Pick |
Places a point directly in the 3D viewer for the point map. |
Thickness Point Map table |
|
Compute |
Runs the calculation and names the result. |
Top ribbon, blue Compute button |